
All About Dexcom G7: How to Use, Placement, Removal, & More
general health
The Dexcom G7 continuous glucose monitor (CGM) was designed to be smaller, faster, and easier to use for people dealing with diabetes symptoms than any CGM before it.
And, for the most part, it’s delivered on that goal.
The Dexcom G7 gives people with diabetes a real-time view of their glucose levels without needing to go through the hassle (and pain) of routine finger sticks.
That said, like any new device, it comes with a learning curve.
Achieving the effortless, simple diabetes management with the Dexcom G7 doesn’t have to be difficult, but it can be tricky to figure out device setup, maintenance, and more.
It can be tricky, that is – unless you have a handy guide to using your Dexcom G7. (Which, good news! You’re in the right place.)
Here, we break down how the G7 works, what’s inside the sensor box, the best placement sites, how to put it on and remove it, how long it lasts, and when you might need a replacement sensor.
What the Dexcom G7 Does (and Why People Love It)
The Dexcom G7 is a factory-calibrated CGM.
This – “factory-calibrated” – means that you don’t need finger-stick calibrations to use it routinely.
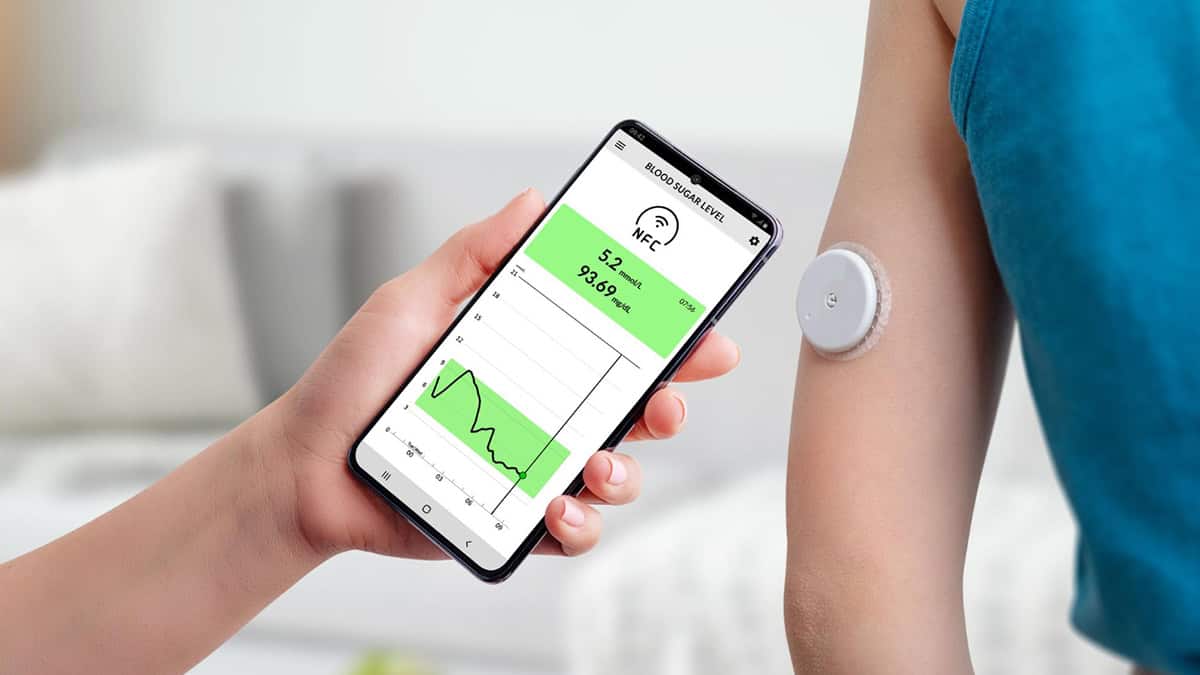
Once you’ve applied your Dexcom G7, the small sensor continuously measures glucose in your interstitial fluid and sends readings automatically to your smartphone via the Dexcom app, or, alternatively, via a Dexcom receiver.
People use the Dexcom G7 because it provides:
- Real-time glucose readings every 5 minutes
- Predictive alerts, including 20-minute “Urgent Low Soon” warnings
- Automatic sensor warm-up in ~30 minutes (much faster than past versions)
- A smaller wearable size – about 60% smaller than the G6
- Integration with insulin pumps and smart devices
- No finger sticks for routine calibration
- Improved accuracy, especially in the low range
So while the G7 has plenty of features behind the scenes, your day-to-day experience with it is designed to be simple:
Wear it, scan your readings, and live your life!
What’s in the Dexcom G7 Sensor Box?
When you open a Dexcom G7 box, you’ll see:
- Your new Dexcom G7 all-in-one sensors (each includes the sensor + built-in applicator)
- User instructions and quick-start guide
- An optional Dexcom receiver, if your prescription includes one
Unlike the G6, the Dexcom G7 does not have a separate transmitter.
Everything you need is contained in a single, disposable, self-contained pod.
For most people, that containment (and associated simplicity of use – fewer things to keep track of!) is one of the biggest design improvements of this model.
How Long Does a Dexcom G7 Sensor Last?
Each G7 sensor lasts up to 10 days, plus a helpful 12-hour grace period to give you time to replace it.
After 10 days, the app or receiver will prompt you to insert a new sensor.
How Much Does the Dexcom G7 Cost?
In the United States, through a brick-and-mortar pharmacy, you may pay as much as $300.00 – 400.00 for a Dexcom G7 set.
Here, through NorthWestPharmacy.com, you can buy that same set for around $119.00 – savings of up to 70%.
Dexcom G7 Placement Sites: Where You Can Wear It
If you’ve seen commercials for continuous glucose monitors or been around friends or family who wear them for diabetes management, you’re likely aware that most people wear it on the back of their upper arm.
There’s a reason for that. For adults 18 and over, the back of the upper arm is indeed the health regulator-approved placement site.
For children who are prescribed the Dexcom G7 CGM, the approved placement sites include the back of the upper arm and the upper buttocks.
Many adults also ask whether the abdomen can be a placement site.
Here’s your answer:
Officially, abdominal placement is not health regulator-approved for adults.
That said, some clinicians may allow off-label placement for certain patients (e.g., if the upper arm isn’t a viable option for any reason). When deciding where to place your Dexcom G7, always follow your prescriber’s specific instructions.
Once placed, the G7 sits low-profile, easily fitting under most clothing. Users tend to forget it’s there after the first day.
How to Apply the Dexcom G7 Sensor: Your Step-by-Step Guide
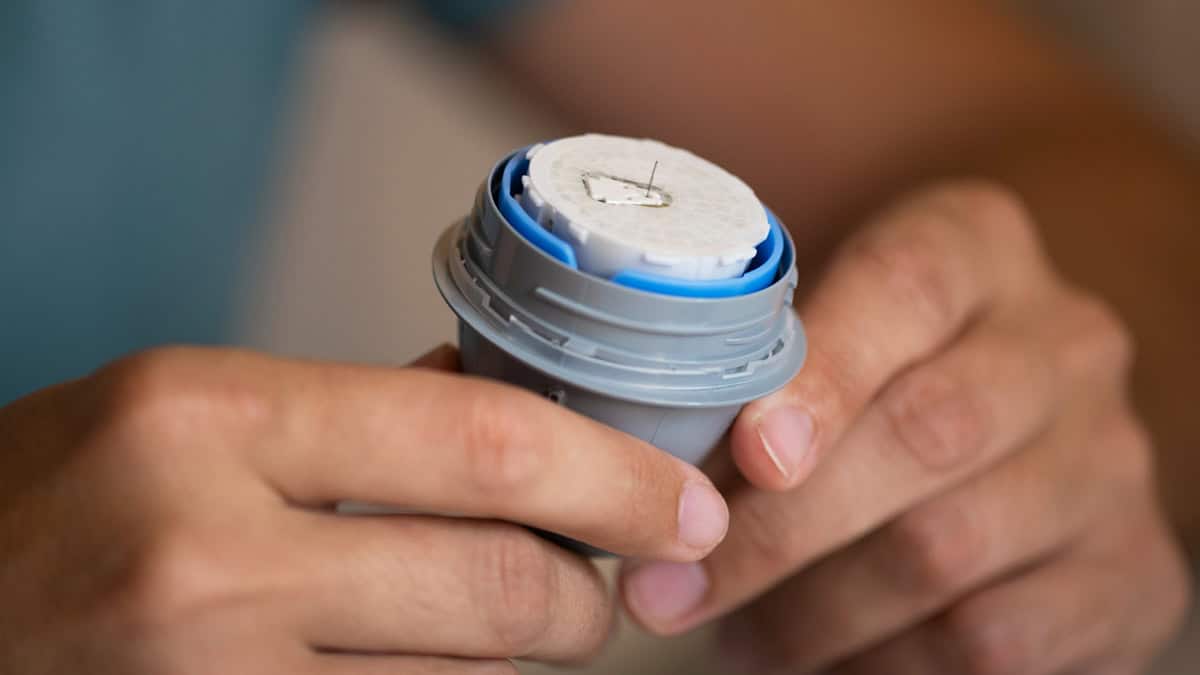
Good news! The G7’s all-in-one applicator is designed to make insertion easier (and much gentler) than traditional CGM systems.
Each sensor arrives preloaded – there’s no separate transmitter to attach – so setup usually takes less than a minute.
Here’s how to apply it properly:
Choose your site. Select the arm or abdomen, avoiding areas with scar tissue, tattoos, irritation, or where your waistband might rub.
Clean the skin thoroughly. Use the included alcohol wipe (or your own if needed) to remove lotions, oils, and sweat.
Let the area dry completely. (This is very important for adhesion!)
Prepare the applicator. Twist off the safety cap. Then, hold the device flat against your skin at your chosen application site.
Press the applicator button. You’ll hear a soft click. The tiny filament inserts just under the skin.
Most users describe the feeling as a quick tap or pinch.
Press down the adhesive edges. Smooth the built-in adhesive around the sensor so it sticks evenly.
Start the sensor in the app or receiver. You’ll scan the pairing code and begin the warm-up period.
This should only take about 30 minutes – it’s the shortest warm-up of any CGM available as of this writing!
Pro tip: If your skin tends to be oily, sweaty, or sensitive, you can add an optional Dexcom G7 overpatch for better adhesion.
Many users rely on these for workouts, heat, and swimming.
How to Use the Dexcom G7 for the First Time
Whether you’re brand new to CGMs or upgrading from the G6, the Dexcom G7 is intentionally simple.
You can use it with either:
- A compatible smartphone, or
- The Dexcom G7 receiver (available separately).
Once you’ve placed your sensor, do the following:
- First, scan or enter the pairing code to link the sensor to the app or receiver.
- Then, wait for the 30-minute warm-up to complete. You won’t receive glucose readings until after this short waiting period.
- After your warm-up is complete, you’ll see your real-time glucose number, trend arrow, and 3-hour graph.
- This would be a good time, if you have a few minutes, to set your high and low alerts so the system notifies you before levels move out of range.
Keeping Your Sensor Secure: Overpatches and Adhesion Tips
Because the Dexcom G7 is smaller and has less adhesive surface area than the G6, some users (think: athletes, swimmers, or anyone who’s wearing this device in a warmer climate) might want to consider an overpatch.
An overpatch is what it sounds like: A sticky patch that goes on over the Dexcom to keep it on the skin.
Dexcom offers approved Dexcom G7 overpatches, but many people also use medical tapes like:
- Opsite Flexifix
- Skin Grip patches
- Tegaderm
- GrifGrips
If you believe that having an overpatch would be helpful for you and your lifestyle, it may be worth trying a few brands or styles out to determine what works best for you.
In any case, before applying an overpatch:
- Make sure the sensor adhesive is fully dry.
- Avoid stretching the overpatch (stretching can cause early patch lift-off).
- Place the patch so it supports, but doesn’t cover, the sensor window.
Finally, for those who have sensitive skin, know this: Barrier wipes (like Skin Prep or IV Prep) can further help improve adhesion without irritating your skin!
What About When to Replace a Dexcom G7 Sensor?
As we noted above, each G7 sensor lasts up to 10 days, with an optional 12-hour “grace period” to switch sensors without losing data continuity.
Your app will alert you when you’re approaching the end of the wear time.
That said, that’s the expected or normal amount of time you can go between sensors.
There may be occasions where you need to replace your Dexcom G7 sensor a bit sooner.
Reasons you may need to replace early include:
- Adhesive peeling off
- Repeated signal loss
- Physical damage (sensor snagged, bumped, or caught on clothing)
- Persistent inaccurate readings compared to fingersticks
How to Calibrate the Dexcom G7 (And When You Shouldn’t)
Since the Dexcom G7 continuous glucose monitoring system arrives factory-calibrated, you don’t need to enter fingerstick values to start or maintain accuracy.
In fact, for most people, the CGM performs best when left alone; no manual calibration required.
Still, there are a few situations where calibrating may help.
For example…
- …If you’ve confirmed a large mismatch between your CGM reading and a fingerstick glucose test.
- …If you recently took medications known to interfere with CGM readings (say, high doses of vitamin C).
- …If your healthcare provider recommends calibration to address persistent reading discrepancies.
If you do decide to calibrate your Dexcom G7, try to use a clean, accurate fingerstick, avoid calibrating during times of rapid glucose change (after meals or exercise), and follow the Dexcom app prompts closely.
Repeated calibration, especially when unnecessary, can actually make your readings less accurate over time, so, only calibrate if it seems very critical to do so – and do so very sparingly.
Troubleshooting Dexcom G7 Alerts and Sensor Errors
The Dexcom G7 is a very reliable device.
You should not go into your experience with it expecting errors.
That said, knowing what to do when your Dexcom G7 does occasionally throw you an error message is a good idea. Most error messages should be very temporary and easy to fix.
Error messages you may see include:
“Signal loss.” You’ll find that this usually happens when your phone is too far away, you’ve accidentally switched your Bluetooth off, or when something else is blocking your device’s connectivity.
After you’ve made sure that your Bluetooth is on and your phone is near, this error message should resolve. If you find that you’re still having issues, try keeping your phone on the same side of your body as your Dexcom G7 whenever possible.
“Sensor warming up.” This is normal during the first 30 minutes of sensor use.
You’ll receive glucose readings as soon as the warmup completes. If you see this message after that initial setup period, that may be a sign that it’s time to reset the device or reach out to the manufacturer.
“Temporary reading issue.” This generally indicates just a short interruption that typically resolves on its own. Wait 10-15 minutes, and then check again.
“Replace sensor early.” When you see this error message, the adhesive on your device may have peeled up, the sensor may have dislodged, or there may be an internal issue.
When in doubt, if you see any of these messages, a quick “stop sensor” and “start new sensor” cycle (with the same physical sensor!) can resolve many errors.
Just be sure not to remove the device unless specifically instructed.
Dexcom G7 Sensor Replacement: What to Know
If you do need to replace your sensor, don’t worry. That can feel frustrating, but you’re in good hands.
Dexcom’s customer service is known for being responsive when sensors end early, fail during warm-up, or give persistent error messages.
In fact, you may be eligible for a free replacement if:
- The sensor fails before the 10-day wear period
- The applicator misfires or doesn’t insert properly
- You see recurring “sensor error” messages
- Adhesive failure occurs despite normal use
- There’s bleeding or pain that forces early removal
When you call, keep the lot number (on the applicator or box) handy.
This information will help Dexcom process your request more easily!
How to Choose (And Buy!) the Right Setup for You
As you’re figuring out which CGM is best for you, it can be difficult to determine whether you should opt for the Dexcom G7 or another model.
Thinking through the following list can help. Consider:
- Where you plan to wear the sensor (The arm is the health regulator-approved location for the Dexcom G7!)
- Whether you’ll use your phone, a receiver, or both
- How often you exercise, sweat, or swim
- Your need for predictive alerts, trend arrows, and data sharing, and
- Which compatible devices you own.
If you’re still unsure after pondering your options, your healthcare provider or diabetes educator can tailor a setup based on your lifestyle.
The Dexcom G7 is one of the most user-friendly CGM systems available today.
It’s small.
It’s easy and quick to apply.
It’s equally easy and quick to remove.
It’s highly accurate without having to go through any complicated calibration activities.
With the right placement, troubleshooting knowledge, and adhesive support, most users find it seamlessly fits into daily life. And with the right international and online Canadian pharmacy website, Americans can access it for a reliably low price.
When you’re ready to buy your Dexcom G7, our team is ready to support you. We look forward to helping you with your healthcare needs!


